As of software version 3.19.4.0, Commercial users with the correct permissions can now edit accounts under their Commercial account. This provides the ability to add or remove contacts who should be receiving results, accessing the portal, or are the primary contact for the Property. This article is broken into the following sections;
- Adding a Contact to an Account
- Deleting a Contact from an Account
Adding a Contact to an Account
- Log into the RATA portal at https://online.fecpakg2.com/
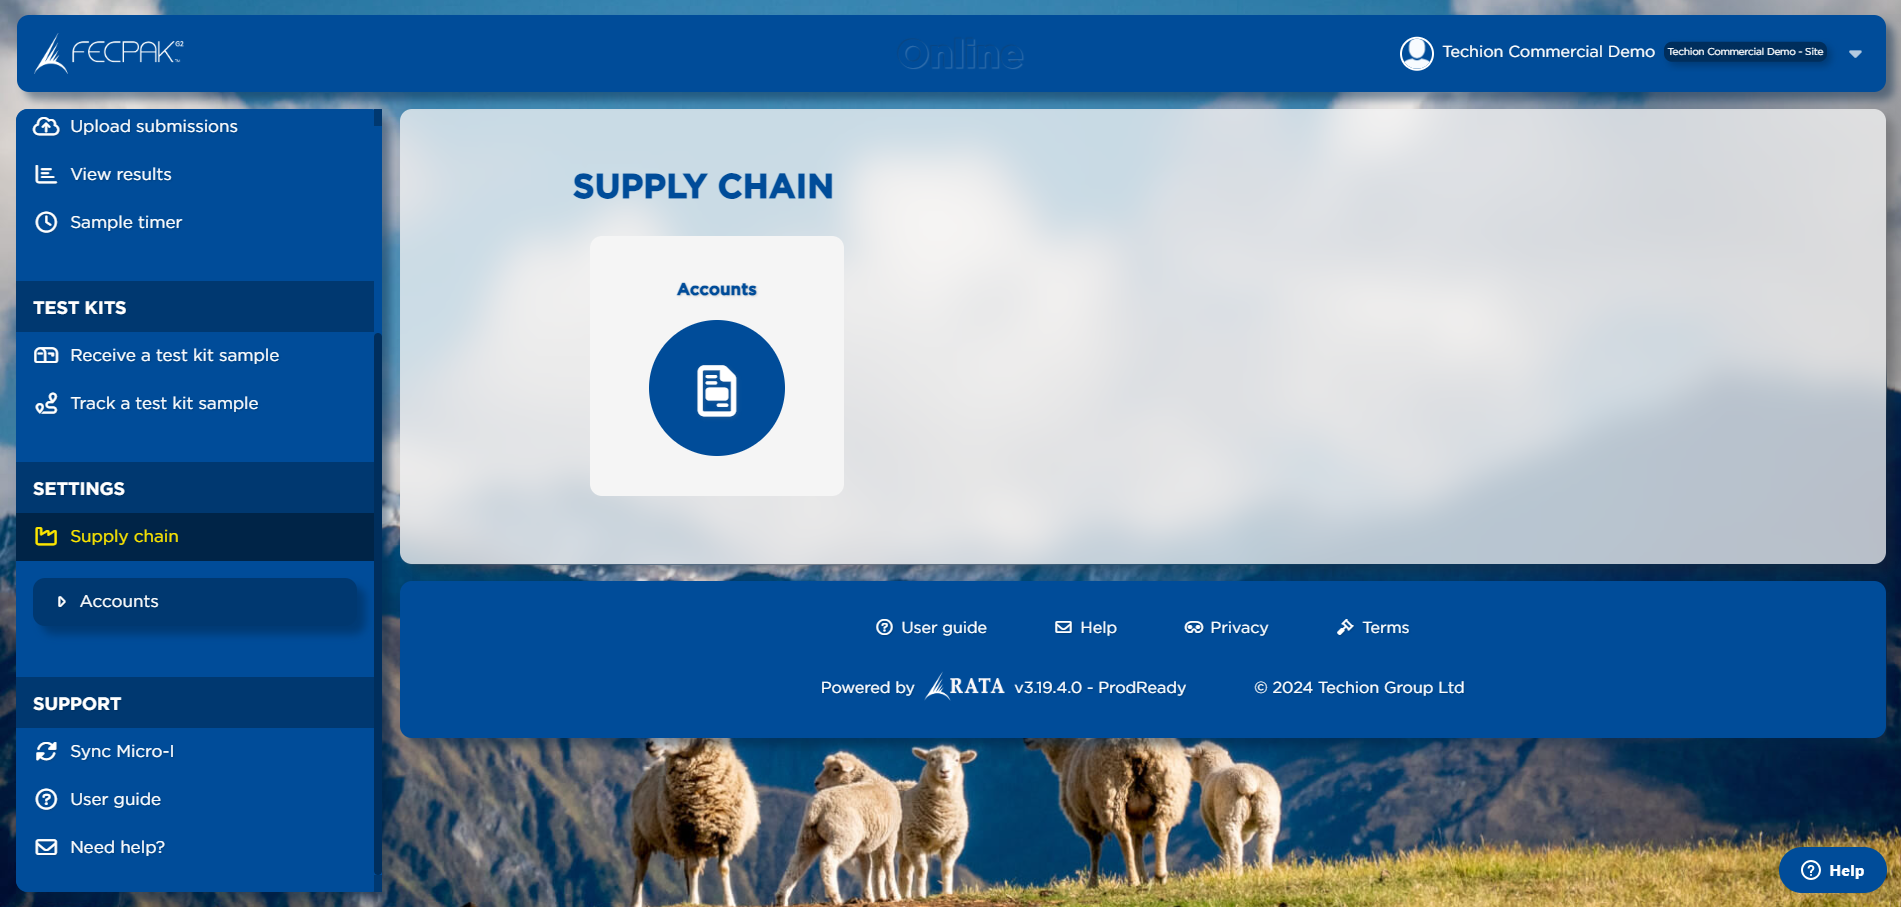
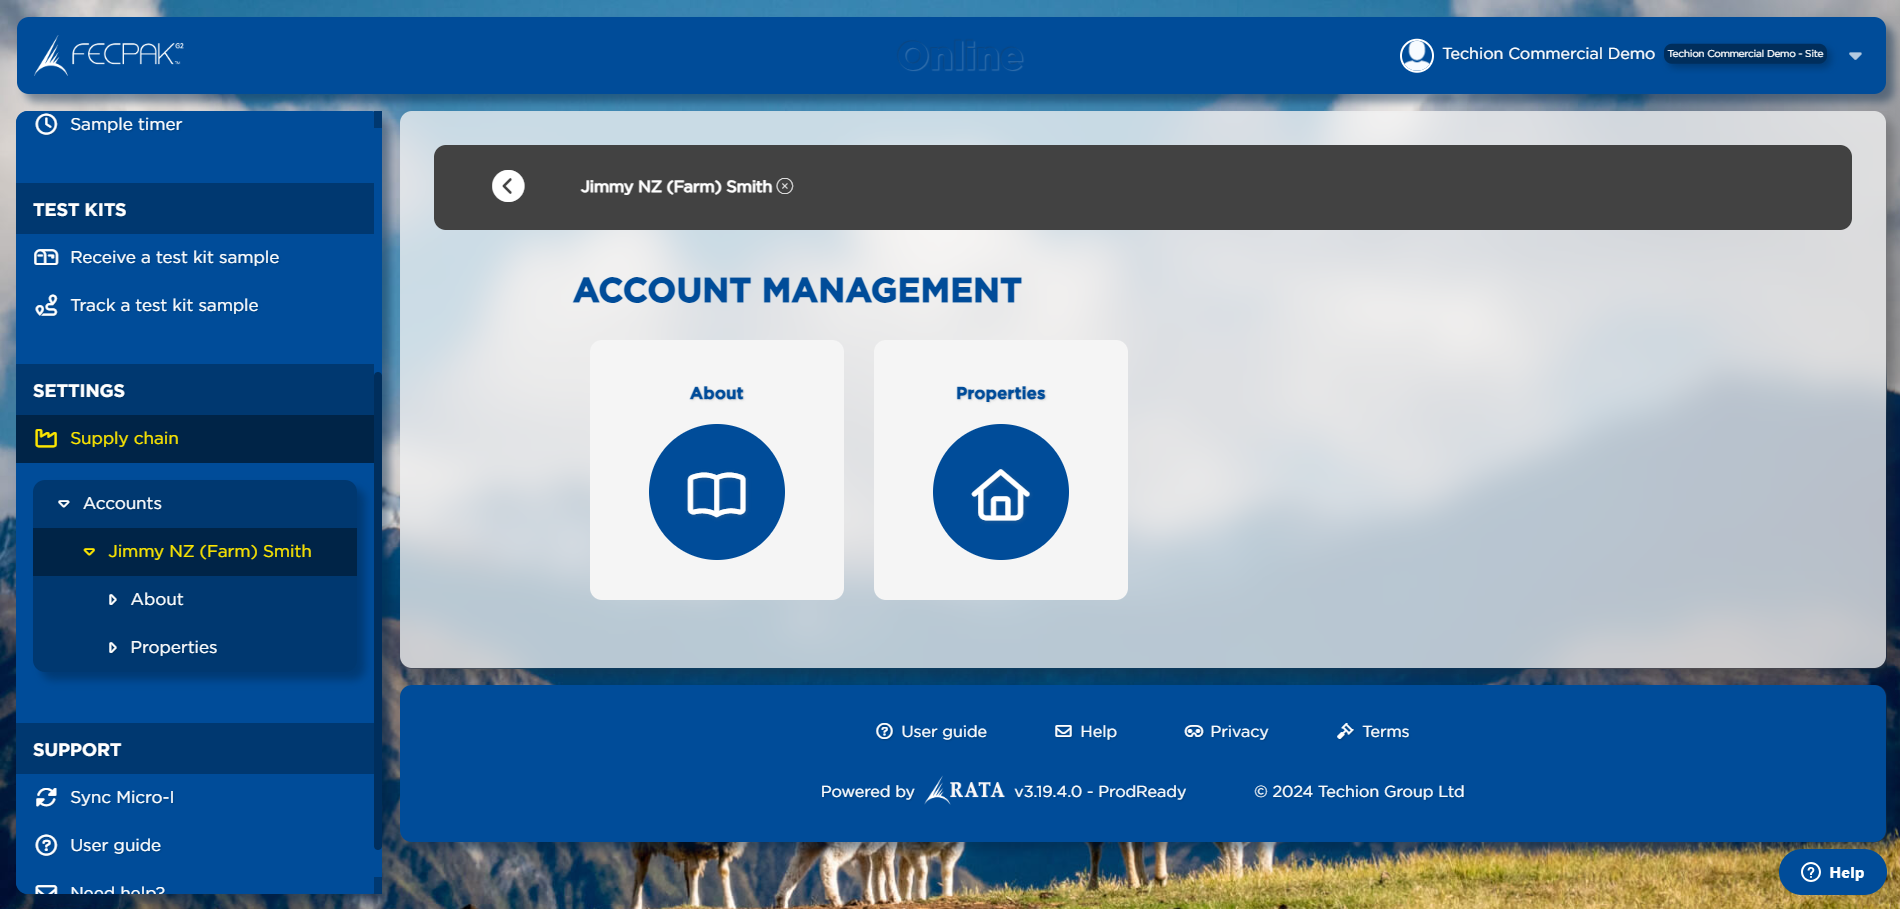
- Select "Supply chain" in the left navigation under "Settings".
- Select "Accounts".

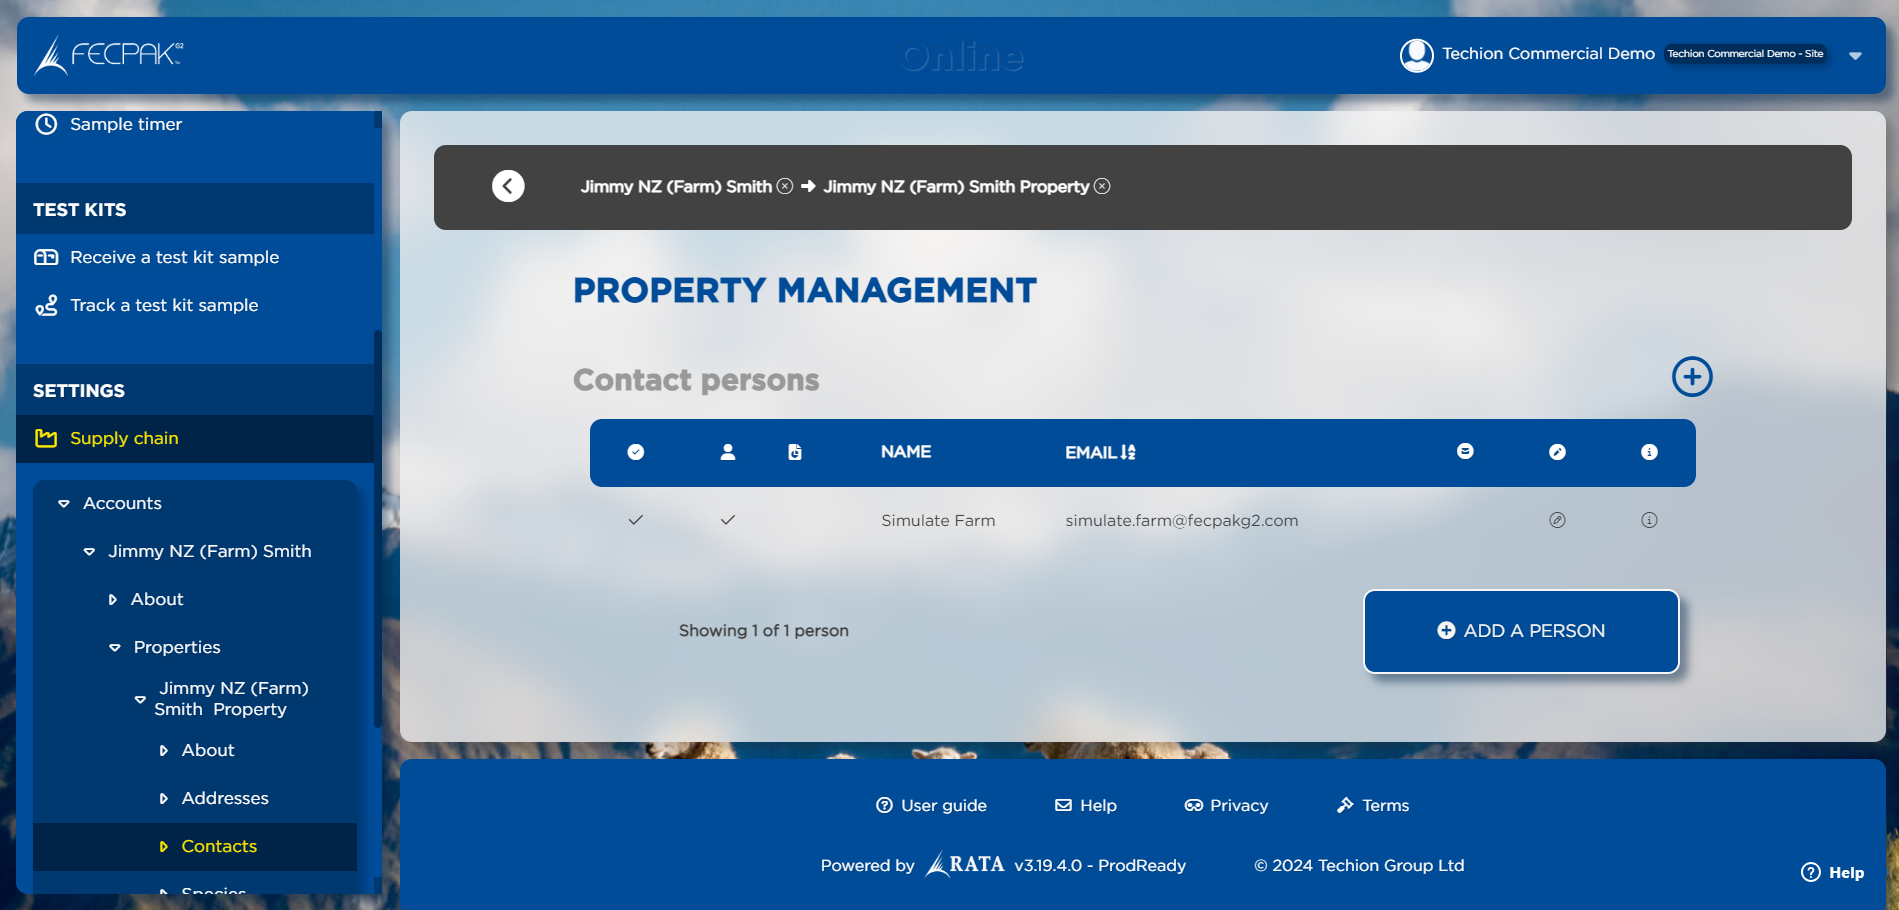
- Select the account you want to add the contact to.
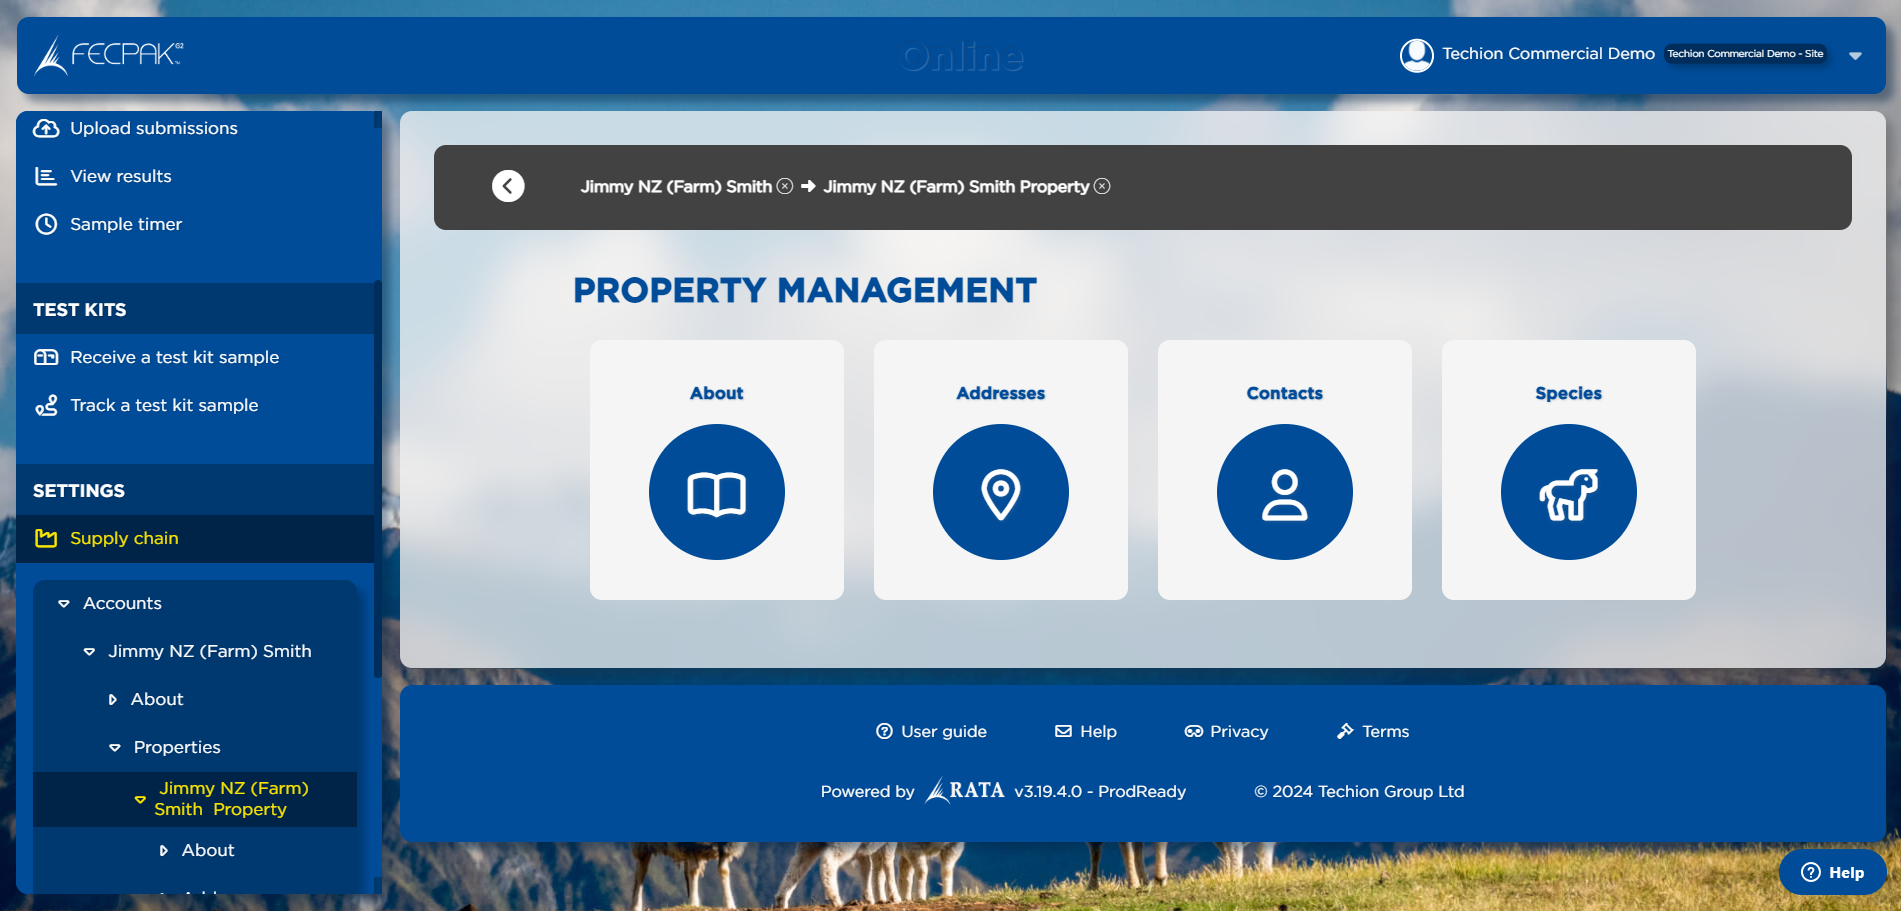
- Select the "Properties" option.

- Select the property you want to add the contact to.
- Select "Contacts".

- Click "Add a person".
- Fill in the required details:
- Email (and Retyped email)
- First Name
- Last Name
- Permissions for the contact can be set up with the following checkboxes:
- To mark the contact as the Primary contact for that property, tick "Primary Contact".
- To allow the contact to log into the RATA portal, tick "Portal access".
- To allow the contact to receive results, tick "Receive results".
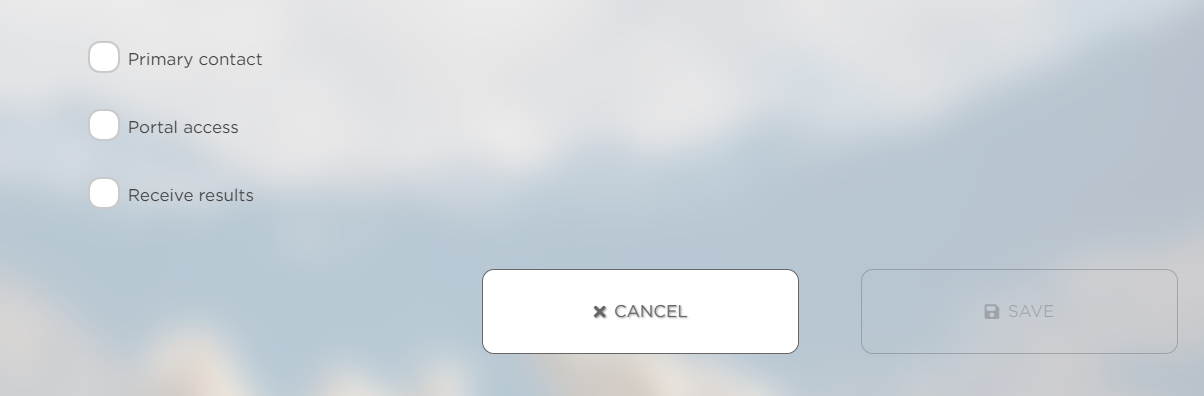
- Click "Save".
The new contact will be added to the property with the permissions you set in step 10.
Removing a Contact from an Account
- Log into the RATA portal at https://online.fecpakg2.com/
- Select "Supply chain" in the left navigation under "Settings".

- Select "Accounts".
- Select the account you want to remove the contact from.
- Select the "Properties" option.
- Select the property you want to remove the user from.
- Select "Contacts".
- Click the Pencil icon (Edit) to modify the contact.

- To prevent the contact from accessing the account, untick the "Active" checkbox.
- NOTE: The Primary contact for a Property cannot be marked as inactive. You will need to mark another contact as the Primary contact first, then you can mark the contact as inactive.
- NOTE: To prevent the contact from receiving results, ensure the "Receive results" checkbox is unticked. An inactive Contact can still receive results if this checkbox is active.
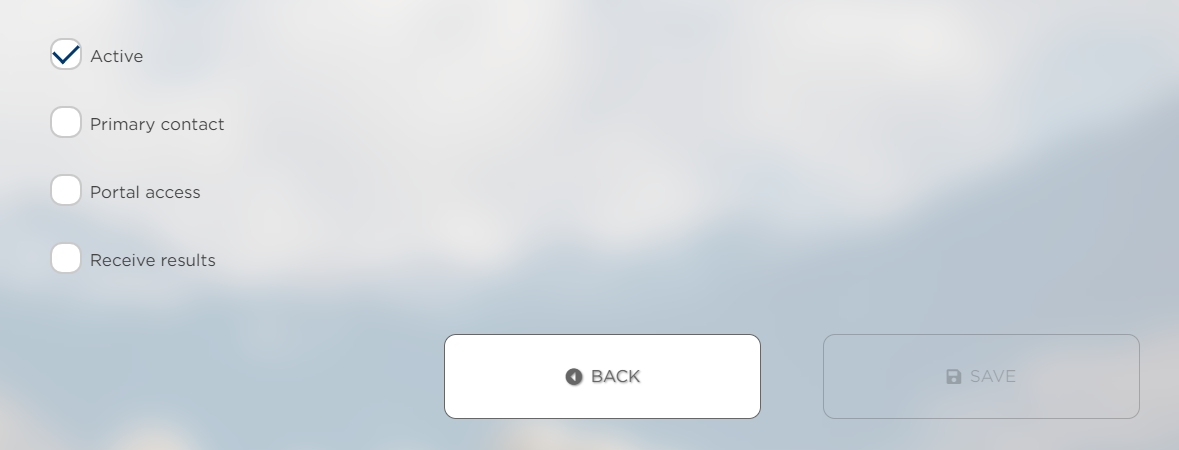
- Click "Save".
The new contact will no longer have access to the property, and will not receive results.