BEHAVIOUR YOU MAY EXPERIENCE:
You are shown an error message when you connect to your Micro-I from within https://online.fecpakg2.com. The error message is:
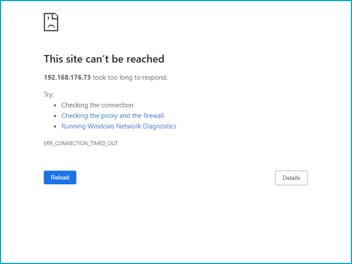
- 'This site can't be reached' in Chrome
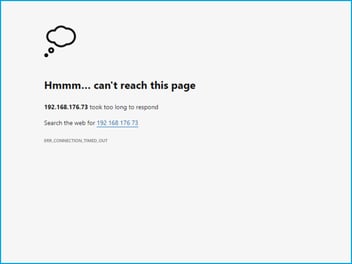
- 'The connection has timed out' in Firefox
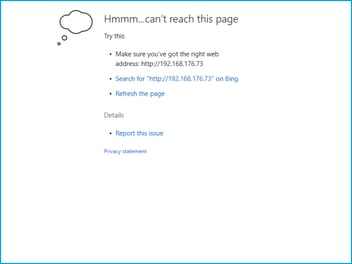
- 'Hmmm... can't reach this page' in Edge.

1. MICRO-I IS TURNED OFF
It may be that your Micro-I is turned off.
Resolve the issue
1. Turn on your Micro-I
- Press the power button on your Micro-I for two seconds to turn it on:
- the power button's back-light will flash red and green before settling on green
- your Micro-I's internal light will glow yellow and flash white before settling on solid white when ready.

2. If applicable, connect your computer to your Micro-I
- Connect using your Micro-I's mobile hotspot:
- select the Wi-Fi settings icon from the system tray on your computer
- note down the network your computer is currently connected to
- select your Micro-I (e.g. MX-MIC-XXXX-X-XXXXXXXXXX)
- the serial number of your Micro-I is printed on the bottom of your Micro-I.
- enter your Micro-I's password and select 'Connect'
- the password of your Micro-I is printed on the bottom of your Micro-I.
- select the ‘Connect’ option
- wait for your computer to connect to your Micro-I.

- Or, connect using the Micro-I USB cable:
- connect one end of the Micro-I USB cable to your computer and the other end to your Micro-I.

3. Log in to your Micro-I
- Visit the FECPAKG2 portal and log in when prompted.

Help Centre
| Please follow a video tutorial on the recommended way to turn on your Micro-I at https://u.fecpakg2.com/hlp-fcpk-trnn. |
2. MICRO-I'S BATTERY CHARGE IS LOW
If the previous solution did not resolve the issue, it may be that your Micro-I's battery charge is too low to power up all the Micro-I's components.
Resolve the issue
1. Turn off your Micro-I
- If your Micro-I is on (i.e. the power button is green), press the power button for three seconds to turn it off:
- the power button's backlight will turn off after flashing red
- your Micro-I's internal light will turn off after flashing amber.

2. Connect your Micro-I to external power
- Plug your Micro-I's power adapter into a wall socket and the other end (Micro-USB) into your Micro-I.
- Turn on the power at the wall socket.

3. Turn on your Micro-I
- Press the power button on your Micro-I for two seconds to turn it on:
- the power button's back-light will flash red and green before settling on green
- your Micro-I's internal light will glow yellow and flash white before settling on solid white when ready.

4. Log in to your Micro-I
- Visit the FECPAKG2 portal and log in when prompted.

3. MICRO-I LOST ITS CONNECTION TO THE NETWORK
If the previous solution did not resolve the issue, it may be that your Micro-I was disconnected from your network:
- your Micro-I, Wi-Fi router or network access point dropped the connection
- the Ethernet cable, if used, was removed.
Resolve the issue
1. Turn off your Micro-I
- If your Micro-I is on (i.e. the power button is green), press the power button for three seconds to turn it off:
- the power button's backlight will turn off after flashing red
- your Micro-I's internal light will turn off after flashing amber.

2. Turn on your Micro-I
- Press the power button on your Micro-I for two seconds to turn it on:
- the power button's back-light will flash red and green before settling on green
- your Micro-I's internal light will glow yellow and flash white before settling on solid white when ready.

3. Log in to your Micro-I
- Visit the FECPAKG2 portal and login if you were logged out.

Help Centre
| Please refer to the Help Centre for further information on connecting your computer to your Micro-I at https://online.fecpakg2.com/help-connect-micro-i-100. |
4. MICRO-I IS NOT SET UP TO CONNECT TO A NETWORK
If the previous solution did not resolve the issue, it may be that your Micro-I is not set up to connect to your network:
- the set-up procedure was not performed
- the set-up procedure was interrupted
- your Wi-Fi password changed.
Resolve the issue
1. Connect your computer to your Micro-I
- Connect using your Micro-I's mobile hotspot:
- select the Wi-Fi settings icon from the system tray on your computer
- note down the network your computer is currently connected to
- select your Micro-I (e.g. MX-MIC-XXXX-X-XXXXXXXXXX)
- the serial number of your Micro-I is printed on the bottom of your Micro-I.
- enter your Micro-I's password and select 'Connect'
- the password of your Micro-I is printed on the bottom of your Micro-I.
- select the ‘Connect’ option
- wait for your computer to connect to your Micro-I.

- Or, connect using the Micro-I USB cable:
- connect one end of the Micro-I USB cable to your computer and the other end to your Micro-I.

2. Connect your Micro-I to the Internet
- Open your browser on the computer you used to connect to your Micro-I and go to http://10.11.12.1/scan:
- select 'Ethernet', or scan for a list of available Wi-Fi networks
- select the Wi-Fi network you would like to connect to, which needs to be the same network your computer, laptop or tablet is connected to
- enter your Wi-Fi password and select 'Connect'.
- Wait for your account information to download to your Micro-I.

3. Reconnect your computer to your Wi-Fi network:
- Select the Wi-Fi settings icon from the system tray on your computer.
- Select your Wi-Fi network.
- Select the ‘Connect’ option.
- Wait for your computer to connect to your network.

4. Log in to your Micro-I
- Visit the FECPAKG2 portal and log in when prompted.

Help Centre
| Please refer to the Help Centre for further information on connecting your computer to your Micro-I at https://online.fecpakg2.com/help-connect-micro-i-100. | |
| Please refer to the Help Centre for further information on connecting your Micro-I to the Internet at https://online.fecpakg2.com/help-ethernet. |
5. MICRO-I IS NOT CONNECTED TO THE SAME NETWORK AS THE COMPUTER
If the previous solution did not resolve the issue, it may be that:
- your Micro-I is not connected to the same network as your computer, laptop or tablet
- your Micro-I is connected to the same network as your computer, laptop or tablet, but devices on your network cannot see each other
- your Micro-I is connected to your network by Wi-Fi and your computer, laptop or tablet is connected to your network by Ethernet, but devices connected by Ethernet cannot see devices connected by Wi-Fi.
If you are in a commercial or laboratory setting, there may be restrictions, isolations or segragations on the network:
- your Micro-I cannot send or receive network traffic
- your Micro-I cannot see other devices connected to the network.
Resolve the issue
1. Connect your computer to your Micro-I
- Connect using your Micro-I's mobile hotspot:
- select the Wi-Fi settings icon from the system tray on your computer
- note down the network your computer is currently connected to
- select your Micro-I (e.g. MX-MIC-XXXX-X-XXXXXXXXXX)
- the serial number of your Micro-I is printed on the bottom of your Micro-I.
- enter your Micro-I's password and select 'Connect'
- the password of your Micro-I is printed on the bottom of your Micro-I.
- select the ‘Connect’ option
- wait for your computer to connect to your Micro-I.

- Or, connect using the Micro-I USB cable:
- connect one end of the Micro-I USB cable to your computer and the other end to your Micro-I.

2. Connect your Micro-I to the Internet
- Open your browser on the computer you used to connect to your Micro-I and go to http://10.11.12.1/scan:
- select 'Ethernet', or scan for a list of available Wi-Fi networks
- select the Wi-Fi network you would like to connect to, which needs to be the same network your computer, laptop or tablet is connected to
- enter your Wi-Fi password and select 'Connect'.
- Wait for your account information to download to your Micro-I.

3. Reconnect your computer to your Wi-Fi network:
- Select the Wi-Fi settings icon from the system tray on your computer.
- Select your Wi-Fi network.
- Select the ‘Connect’ option.
- Wait for your computer to connect to your network.

4. Log in to your Micro-I
- Visit the FECPAKG2 portal, and log in when prompted if you were logged out.

5. In a commercial or laboratory setting:
- Check with your local IT team that the network you are connecting the Micro-I to is the same network as the one your computer, laptop or tablet is connected to.
- Confirm with your local IT team that there are no restrictions on the network that prevent the Micro-I from being seen on the network or from connecting to the Internet.
- If there are restrictions, have your local IT team open the relevant network ports to allow inbound and outbound traffic from the Micro-I. See 'Firewall configuration' at https://online.fecpakg2.com/help-troubleshooting.
Help Centre
| Please refer to the Help Centre for further information on connecting your computer to your Micro-I at https://online.fecpakg2.com/help-connect-micro-i-100. | |
| Please refer to the Help Centre for further information on connecting your Micro-I to the Internet at https://online.fecpakg2.com/help-ethernet. |
WORKAROUND
1. Turn off your Micro-I
- If your Micro-I is on (i.e. the power button is green), press the power button for three seconds to turn it off:
- the power button's backlight will turn off after flashing red
- your Micro-I's internal light will turn off after flashing amber.

2. Turn on your Micro-I
- Press the power button on your Micro-I for two seconds to turn it on:
- the power button's back-light will flash red and green before settling on green
- your Micro-I's internal light will glow yellow and flash white before settling on solid white when ready.

3. Connect your computer to your Micro-I
- Connect one end of the Micro-I USB cable to your computer and the other end to your Micro-I.

4. Connect your Micro-I to the Internet
- Open your browser on the computer you used to connect to your Micro-I and go to http://10.11.12.1/scan.
- Select 'Ethernet'.
- Wait while your account information downloads. This may take a few minutes.

5. Log in to your Micro-I
- Visit the FECPAKG2 portal on http://10.11.12.1 and log in when prompted.
