BEHAVIOUR YOU MAY EXPERIENCE:
Your Micro-I turns off intermittently.
1. MICRO-I'S BATTERY CHARGE IS LOW
It may be that the Micro-I's battery's charge is too low to power up all the Micro-I's components.
Resolve the issue
1. Turn off your Micro-I
- If your Micro-I is on (i.e. the power button is green), press the power button for three seconds to turn it off:
- the power button's backlight will turn off after flashing red
- your Micro-I's internal light will turn off after flashing amber.

2. Connect your Micro-I to external power
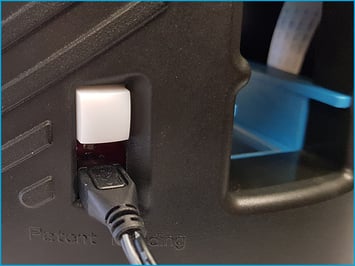
- Plug your Micro-I's power adapter into a wall socket and the other end (Micro-USB) into your Micro-I.
- Turn on the power at the wall socket.

3. Turn on your Micro-I
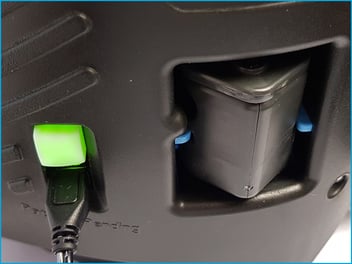
- Press the power button on your Micro-I for two seconds to turn it on:
- the power button's back-light will flash red and green before settling on green
- your Micro-I's internal light will glow yellow and flash white before settling on solid white when ready.
2. POWER ADAPTER IS INCOMPATIBLE OR FAULTY
If the previous solution did not resolve the issue, it may be that your Micro-I is using an incompatible power adapter, or the power adapter is faulty.
Resolve the issue
1. Turn off your Micro-I
- If your Micro-I is on (i.e. the power button is green), press the power button for three seconds to turn it off:
- the power button's backlight will turn off after flashing red
- your Micro-I's internal light will turn off after flashing amber.

2. Inspect the equipment
- Remove the power adapter from the wall socket and the Micro-I in a safe manner.
- Inspect the power adapter and its cable for visible damage.
- Check the power adapter. The required capacity is:
- Output: 5.1V and 2.5A
- Input: 100-240V, 50/60Hz and 0.5A.

3. If the power adapter or its cable appears to be visibly damaged
- Do not use the damaged power adapter or cable any further.
- Please replace the power adapter.
4. If the power adapter does not meet the requirements
- Do not use the incompatible power adapter with your Micro-I any further.
- Please replace the power adapter.
5. Contact Techion Support
- Please contact Techion Support via https://u.fecpakg2.com/support, and provide:
- the serial number of your Micro-I (i.e. MX-MIC-XXXX-X-XXXXXXXXXX)
- your first and last names
- your email address
- your telephone number
- mention the make, model, output voltage, output ampere and condition of the power adapter and its cable.

6. For Techion Support
3. SOFTWARE IS CORRUPT
If the previous solution did not resolve the issue, it may be that the software has become corrupt. Techion Support will need to assist in resolving the issue.
Resolving the issue
1. Prepare your Micro-I for Techion Support to connect to it remotely
- Turn off your Micro-I:
- if your Micro-I is on (i.e. the power button is green), press the power button for three seconds to turn it off:
- the power button's backlight will turn off after flashing red
- your Micro-I's internal light will turn off after flashing amber.

- Connect your Micro-I to your network:
- move your Micro-I near your Wi-Fi router or network access point
- plug one end of the Ethernet cable into your Micro-I and the other end into your Wi-Fi router or network access point.

- Connect your Micro-I to external power:
- plug your Micro-I's power adapter into a wall socket and the other end (Micro-USB) into your Micro-I
- turn on the power at the wall socket.

- Turn on your Micro-I:
- Press the power button on your Micro-I for two seconds to turn it on:
- the power button's back-light will flash red and green before settling on green
- your Micro-I's internal light will glow yellow and flash white before settling on solid white when ready.
- Press the power button on your Micro-I for two seconds to turn it on:

- Insert a cassette:
- Insert a full cassette partway through your Micro-I, gently pushing it in until the cassette starts protruding out the back of your Micro-I.
2. Contact Techion Support
- Please contact Techion Support via https://u.fecpakg2.com/support, and provide:
- the serial number of your Micro-I (i.e. MX-MIC-XXXX-X-XXXXXXXXXX)
- your first and last names
- your email address
- your telephone number
- mention that your Micro-I turns off intermittently.

3. For Techion Support
4. SD CARD IS REMOVED, DISLODGED OR FAULTY
If the previous solution did not resolve the issue, it may be that your Micro-I 's SD card is damaged, got dislodged, or has been removed. There is a solution you can try yourself in the first instance, but Techion Support may need to assist in resolving the issue.
Resolve the issue
1. Turn off your Micro-I
- If your Micro-I is on (i.e. the power button is green), press the power button for three seconds to turn it off:
- the power button's backlight will turn off after flashing red
- your Micro-I's internal light will turn off after flashing amber.
- Remove the power adapter from your Micro-I in a safe manner.

2. Inspect your Micro-I
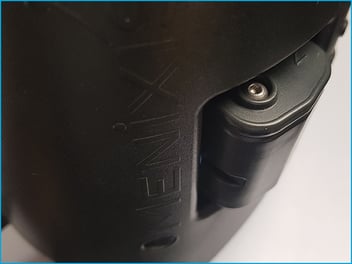
- Check the SD card at the base of your Micro-I.

3. If the SD card is dislodged
- The SD card will be skew or may be poking out by more than approximately 2mm.
- Gently push the SD card back into the slot and ensure it is straight and pokes out the Micro-I by no more than approximately 2mm.
- Plug your Micro-I's power adapter into the wall socket and the other end (Micro-USB plug) into your Micro-I, and turn on the power at the wall socket.
- Press the power button on the Micro-I for two seconds to turn it back on:
- the power button's backlight will glow solid green
- the Micro-I's internal light will glow solid white.
4. If the SD card is present and is not dislodged, or the SD card is not visibly present, prepare your Micro-I for Techion Support to connect to it remotely
- Connect your Micro-I to your network:
- move your Micro-I near your Wi-Fi router or network access point
- plug one end of the Ethernet cable into your Micro-I and the other end into your Wi-Fi router or network access point.

- Connect your Micro-I to external power:
- plug your Micro-I's power adapter into a wall socket and the other end (Micro-USB) into your Micro-I
- turn on the power at the wall socket.

- Turn on your Micro-I:
- Press the power button on your Micro-I for two seconds to turn it on:
- the power button's back-light will flash red and green before settling on green
- your Micro-I's internal light will glow yellow and flash white before settling on solid white when ready.
- Press the power button on your Micro-I for two seconds to turn it on:

5. Contact Techion Support
- Please contact Techion Support via https://u.fecpakg2.com/support, and provide:
- the serial number of your Micro-I (i.e. MX-MIC-XXXX-X-XXXXXXXXXX)
- your first and last names
- your email address
- your telephone number
- mention whether the SD card is present or not.

6. For Techion Support