BEHAVIOUR YOU MAY EXPERIENCE:
The cassette does not stop at the first well after you insert it, instead ejecting from the device.
1. THE CASSETTE WAS INSERTED TOO FAR
It may be that you pushed the cassette in too far when you inserted it.
Resolve the issue
1. Remove the cassette
- Pull the cassette out gently from the back of your Micro-I.

2. Reload the web page
- Refresh your web page by holding down the 'Ctrl' key while pressing 'F5'.

3. Return to your submission
- If you were taken away from the sample submission form:
- Select 'Edit a submission'.
- Select the sample you want to submit.

4. Check your sample
- Confirm that your fill is still good:
- If not and your sample has been resting in the sedimenter/saline for less than an hour, refill the cassette
- If not and your sample has been resting in the sedimenter/saline for more than an hour, prepare a new sample.

5. Insert the cassette
- When prompted:
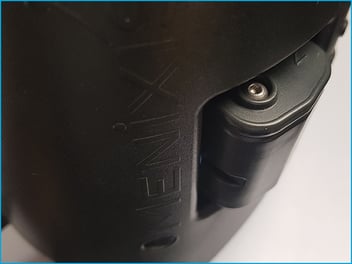
- Hold the cassette as still and level as possible
- Gently insert the cassette into your Micro-I, leading with the pointed end
- Ensure the cassette is pushed as far in until you feel resistance from the motors.

Help Centre
| Please refer to the Help Centre for a video on the recommended way of inserting a cassette at https://u.fecpakg2.com/hlp-fcpk-insrt. |
2. CAMERA IS MISALIGNED
If the previous solution did not resolve the issue, it may be that the camera has become misaligned. Techion Support will need to assist in resolving the issue.
Resolve the issue
1. Prepare your Micro-I for Techion Support to connect to it remotely
- Turn off your Micro-I:
- If your Micro-I is on (i.e. the power button is green), press the power button for three seconds to turn it off:
- The power button's backlight will turn off after flashing red
- Your Micro-I's internal light will turn off after flashing amber.

- Connect your Micro-I to your network:
- Move your Micro-I near your Wi-Fi router or network access point.
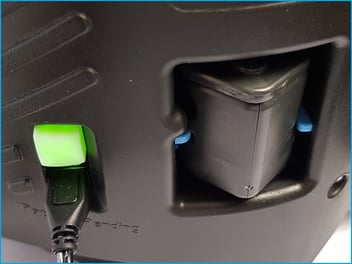
- Plug one end of the Ethernet cable into your Micro-I and the other end into your Wi-Fi router or network access point.

- Connect your Micro-I to external power:
- Plug your Micro-I's power adapter into a wall socket and the other end (Micro-USB) into your Micro-I.
- Turn on the power at the wall socket.

- Turn on your Micro-I:
- Press the power button on your Micro-I for two seconds to turn it on:
- the power button's back-light will flash red and green before settling on green
- your Micro-I's internal light will glow yellow and flash white before settling on solid white when ready.
- Press the power button on your Micro-I for two seconds to turn it on:

- Insert a cassette:
- Insert a full cassette partway through your Micro-I, gently pushing it in until the cassette starts protruding out the back of your Micro-I.
2. Contact Techion Support
- Please contact Techion Support via https://u.fecpakg2.com/support, and provide:
- The serial number of your Micro-I (i.e. MX-MIC-XXXX-X-XXXXXXXXXX).
- Your First and Last names.
- Your email address.
- Your telephone number.
- Mention that the cassette goes straight through your Micro-I without stopping.

3. For Techion Support